
Super Quick Mosaic Tile Technique
Today I’m sharing a fun and easy technique—the Mosaic Tile Technique!
You don’t need any extra tools or supplies. Just use what you already have to give your stamped images a fresh, new twist!

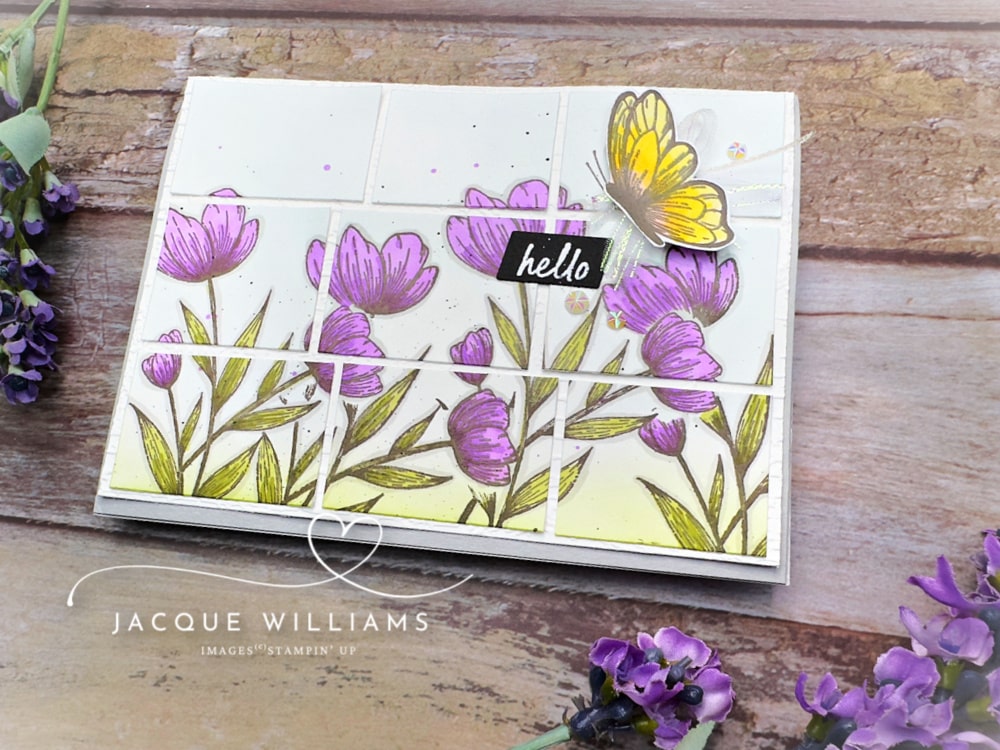
For this sample, I used the Spotlight on Nature stamp set. I colored the flowers and butterfly with Stampin’ Blends, then added a soft background using blending brushes.
Next comes the fun part—cutting your image into “tiles”! It creates such a cool effect, and all you need is your Paper Trimmer. No special tools required!

In the video below, I’ll walk you through a few fun variations of the Mosaic Tile technique—think squares, rectangles, a brick layout, or even a more random, organic look.
To add a little pop, I placed the butterfly separately on top for extra dimension.
Bonus Tip: Stamp the butterfly directly onto your card front first. Then, stamp it again on another piece of cardstock, color it, and cut it out. No need to worry about those tiny antennae—just leave them off when you cut. The image underneath will take care of that for you!

Please also enjoy this short, edited video with a quick demonstration of the Mosaic Tile Technique, as well as a few variations.
Subscribe to my YouTube Channel for weekly tips and project ideas!
Stuck on what to make? Design Spark is your go-to digital sketchbook with 30 card sketches (with measurements!) —each in three variations—for 120 total designs to spark your creativity. Whether you love clean and simple or layered and detailed, you’ll find inspiration on every page.
Happy crafting! ~Jacque

how do you make a slimline card and where do you find envelopes for them
Hi there – a slimline is really just a long card. You can find templates with measurements here: https://archive.stamphappy.co.nz/product/card-sketch/. I can currently working on one for envelopes, but they are pretty easy to just make to fit your card, too. Here is a video: https://youtu.be/ieQ4T-AfH0I