
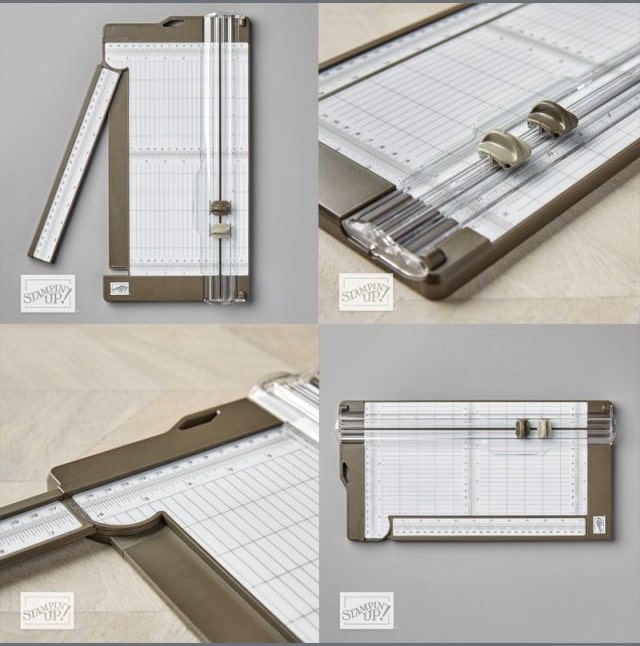
Tips & Tricks with Your Paper Trimmer!
A paper trimmer is a must-have tool for papercrafters, and it’s important to get the right one. Equally as important is knowing how to use it, and knowing all the features so you can make the most of your purchase.
In today’s video, I’m sharing quite a few tips and tricks for your paper trimmer, whether you have the Stampin’ Up! branded one or a different brand, I’m confident you’ll find a few useful tips or reminders in here.
For your convenience, I’ve compiled all the tips, plus a few extras, into a downloadable PDF for you to print and keep near your trimmer (or you may have a folder where you keep your techniques and things).
Inside you’ll learn how to:
- Use both blades efficiently (and tell them apart at a glance)
- Extend the life of your trimmer blades
- Cut accurately using all the ruler features
- Score, align, and trim with pro-level confidence
- Avoid fuzzy edges and crooked cuts
Designed with the Stampin’ Up! Trimmer in mind, but many tips apply to other quality paper trimmers too.
Your copy is just $12 NZD (about $7 USD), and will be emailed to you instantly.
Please also enjoy this edited video for your inspiration and
Subscribe to my YouTube Channel for weekly tips and project ideas!
Love this tip? Come craft with me! Join my self-paced techniques class with lifetime access, so you can learn whenever it suits you. Explore my selection of technique classes! I can’t wait to create beautiful projects together! ~ Jacque


I also use my trimmer when I am folding cardstock in half for card bases.
FirstIy place the card stock bottom left as it has the left hand side and base groves to keep the card perfectly straight both ways… then fold over the RHS end to the left into the grooves. Voila perfect fold every time. ‘cheers Joy Smelt (Aust)
Hi Joy – brilliant tip! Thank you 🙂